Monday, August 27, 2012

Unusual Model.

Here's a project that isn't quite "design", but I thought you could appreciate it and perhaps help a fellow design students to build a model. This project was for a model making class.

The goal was to create a model that can show it's interior space WITHOUT using any tape, glues or adhesives. For this particular class the spaces were not as important as the model itself. As far as material, any material was fine as long as it respected the rule of no adhesives.

I chose to model a simple retail space. I decided to use Foam core (aka Foam board) for the main body of the model, a small piece of acrylic at the "entrance" of the store, and a small piece of bass wood at the "back" of the store.


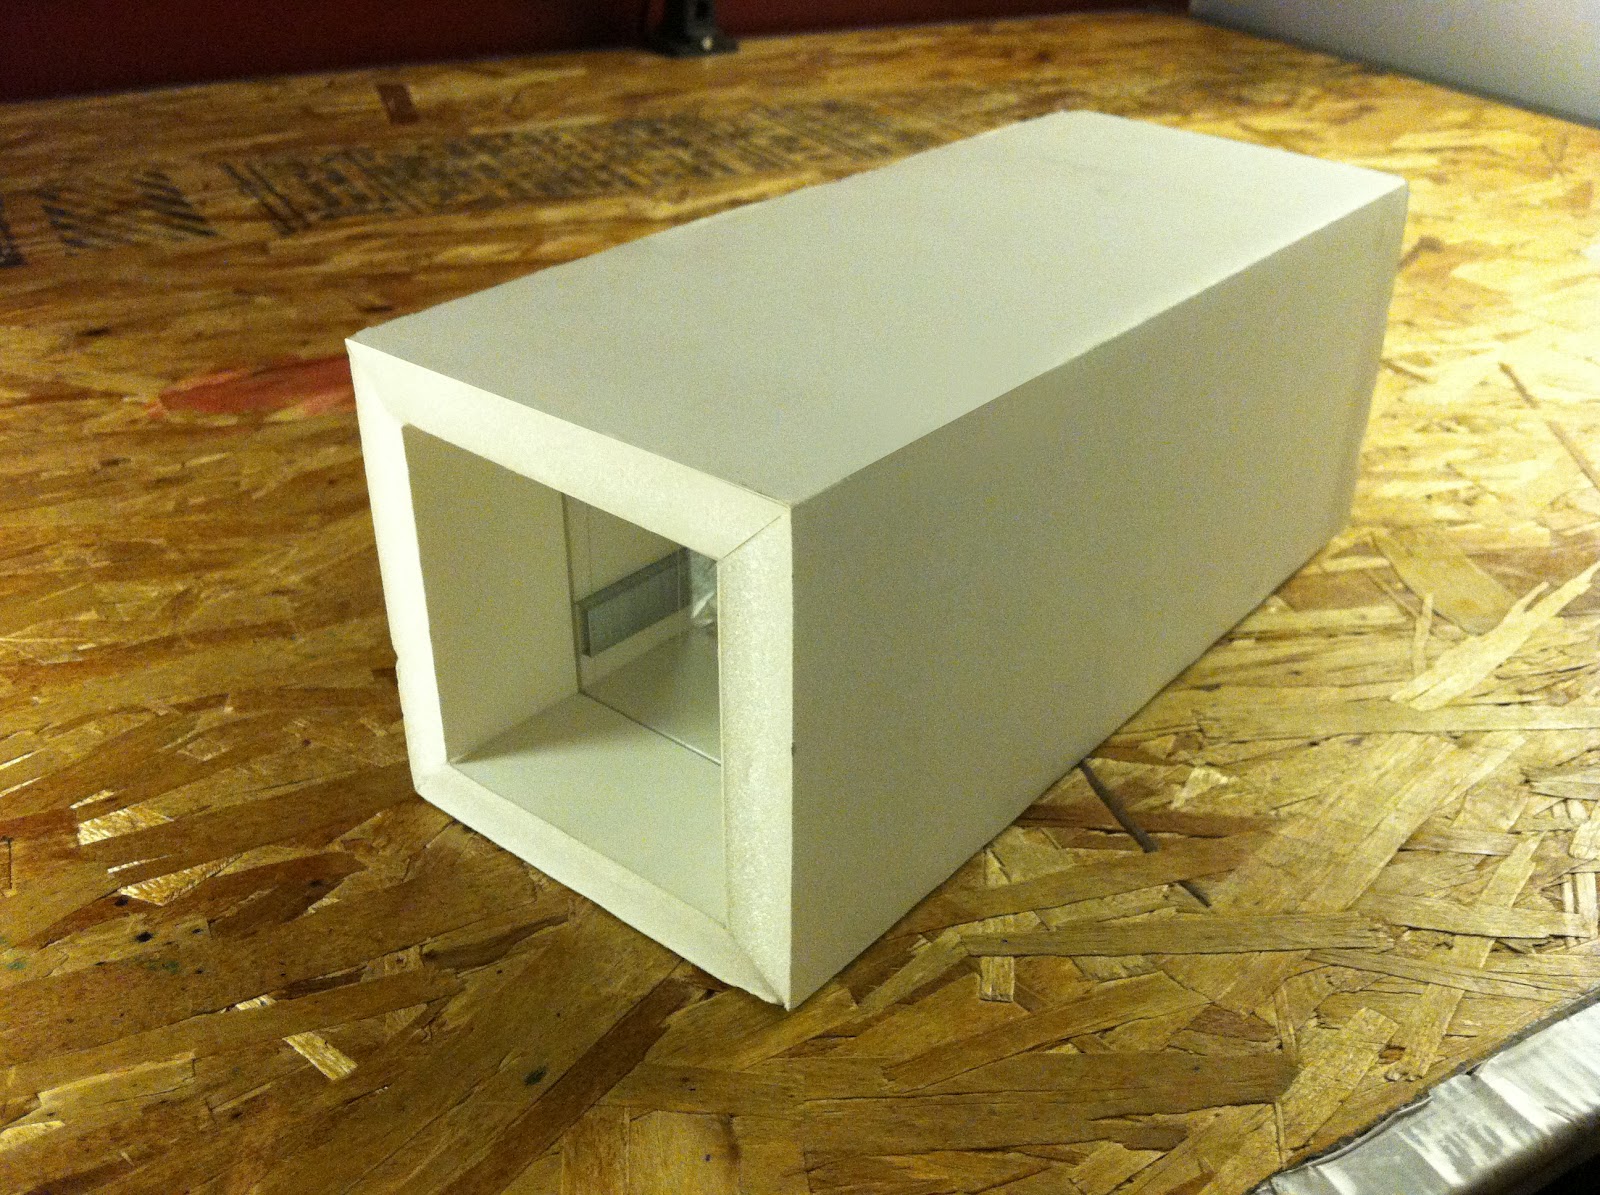
The model volume. It is made up of two pieces, each with a 90 degree bend.
 
The entrance view, through the Acrylic facade. You can see the light going through the bends of the foam board, an aesthetic result of the material. A happy accident. :)


To reveal the interior space you remove one of the 90 degree bent foam board pieces. This reveals the secret of using magnets! :D


A view of the retail space. The "bench" is made of spare foam board pieces.


To simulate a mural, I used one of those tiny soap bars you see in Hotel bathrooms! :D


A close up of the tiny (free) hotel soap bar. It kind of looks like marble! 


To simulate glass panels I lightly scored the acrylic. I also scored the foam board to tightly hold it in place.


To simulate shelves I used whole rows of Staples! I simply scored the foam board, and pushed the staples into it.


To simulate.... I'm not sure, lighting fixtures...or vents (in the roof), I used candle flint holders.


These are just some things I had laying around my house, and it's amazing how they look like something entirely different at a different scale. This was a fun assignment. I hope you enjoyed it!

Thanks for listening. :)

Thursday, August 16, 2012

Improvised Table

I was given a plywood Lid, left over from a wooden box, and was asked to make a table with it.

 I had four left-over 4" cubes of wood (which I had chopped from a 8' post of wood for a different project) I drilled the cubes to the corners of the table - but as would imagine 4" off the ground is not 
enough, so I had to make legs.


(Above you see the cube drilled to the Lid, and the Leg drilled to the Cube)


I had some left-over scraps of plywood form a previous project, and had to cut it efficiently in order to make 4 legs for the table. I quickly sketched out a layout that would give me legs.


Then I drilled the legs to the 4" cubes I had just put on the Lid.


Thats it! It was sort of freestyle furniture making, I didnt sketch at all (except for when I made the legs) so the outcome was more or less unpredictable, but good. I'll update this post later, because I plan on making a better developed version.

Thanks for listening. :)

Friday, August 10, 2012

Modular Clocks

The project was to design a clock. My respond to it is, as always, was: What is it's function?

What is the purpose of a clock? Is it merely to tell time? And if so, to who and where?
Telling time to a person sleeping in their bed is entirely different than telling time to a train station filled with people.

Also, What is Time? If human's didn't have consciousness would we feel time? Would it then "Exist"?
Is time moving from Now to Then? Or are we moving form Now to Then?


These questions lead me in the Concept Development phase of my project.


A sculptural approach to the design of a clock. To attract your eyes to tell you the time.


A cone clock. It measures with different increments. This idea plays with the multi-layered aspect of time as we consider it.

A ruler clock. A minimalist spin on the "measurability" of time. The time ruler would shift from left to right, using the center line as the dial. Which brings to mind the question: Is time moving? or de we?

I'm not sure what the top left and bottom left are. lol But the one on the right is considering the possibility of a clock from a different location. This used clock is horizontally, it's dials poke up so the user can see (and read) the time from it's horizontal layout.

A cone with a subtle cut, using the surface as the face to tell time. A cube with cushioning lumps, so when the alarm goes off it wont break as you throw it across the room. lol

(Left) A clock that separates Hour and Minute.
(Right) An abstraction of a log of wood. Separating Hour, Minute, Second.
The functional and modular potential of clocks by molding standard sided sheets of wood.


Modular potential of molded plywood sheets:


Out of the many forms possible, I selected 3 to render by hand and show as the finished products.


A fun project, definitely exercised my drawings skills, and made me realize how much there is to explore about a given subject (in this case time). It's pretty amazing how many ideas can derive from questioning a seemingly obvious subject.

More posts coming up. Thanks for listening.  :)

Saturday, August 4, 2012

Emergent: Tape Cave

When you think of how you build with Brick you quickly get an idea of what is possible, and what isn't. The same is true with Wood, or Steel, or any other conventional building material. But what about an Unconventional building material, like Tape? The idea behind this project was to explore the structures that would emerge when building with an unconventional material such as Tape.

Projects Requirements: 

- Must respond to the physical conditions of the site.
- It must be inhabitable by at least 1 person at a time.
- The only usable building material is Tape (any type).
- Structure must be quickly assembled on site.
- Must be shippable. 


Original Sketch:
The sketch shows the idea of suspending people, with a viewer within.

Study Model:

This was the first of many study models. It was used to get a better understanding of the Tape as a building material. It quickly showed me how much influence the site (where ever we choose to build it) will have on the end result.


An interior space shows the potential spaces that can be created with Tape.


Putting light to the study model, changing the way we perceive it.


Study Model (Larger scale):

An 8' frame where a bigger tape study model was wrapped around.


Using Scotch 2.5mm Packaging Tape. This stuff is expensive but really tough, and would be perfect to create the "framework" of the structure.


A more developed framework.


Once framework was in place, the "skin" comes next. This quickly got expensive, and suggested the possibility of using different tapes. (Tough and expensive for the "framework", Weak and inexpensive for the "skin")


Again, doing a light test.


A creeper. lol


A picture of the interior spaces created. Much better.


 Site + Model:

Once there was a site the project completely changed. I used Saran warp to simulate tape at a smaller scale.


A 1/8" = 1'0" model of project.


The Framework.


In order to transport the project to the site, and build it time efficiently, the structure was compartmentalized and built off-site.

A Plan & Section Drawing of the project at 1/4" = 1'0".


 The Tape Cave:


These are the pictures taken at night. The project attracted to much attention at our school, that we where allowed to keep it far beyond the time originally given. The project used


A user in the belly of the beast.


A student checking it out.


A close up of the Framework and Skin.


The mouth of the cave.

This was an amazing experience for me. Designing, developing, building, and documenting this project was a blast. Definitely a great experience.

More posts to come.

Thanks for listening. :)